
Concept Handle #1 - Brass Pin (or all about handles)
Like everything I do anymore, this idea has been a long time coming. In fact, I built the first and second fully completed knives with this style handle in April of 2024. The concept is based on the way Japanese swords are handled. Enthusiasts of that art maintain that the tang is as important (aesthetically) as the blade. Therefore, when viewing a sword, one first admires the meticulously polished blade and then carefully removing the wooden pin with a special tool, gently detaches the handle. The tang will contain the engraved calligraphy of the smith who forged it. This “Meikiri” is especially important to the overall beauty of the sword, as is the exact shape of the tang, the file work and the location of the pin holes. There are so many interesting aspects to this ( e.g. the fact that half the sword is hidden from view when assembled or the way that disassembling the handle requires ritual-like care and focus which puts one in a contemplative mindset when the tang is revealed) but for the purpose of this article, the most important idea is that a blade is a sovereign steel object and a handle is a separate item that is useful for holding the blade.
I believe that this philosophy is to some degree shared by all Japanese blade making traditions, including kitchen knives. The traditional approach to handling kitchen knives in Japan is to heat the tang and burn it into the handle. The wood smoke creates creosote which acts as a mild glue to hold them together. No rivets or pins or fasteners are used and until modern times, no glues or sealants. The handles are also made of comparatively humble materials. This system supposes that the handle is not a permeant part of the knife and might be replaced any number of times over the life of the blade.

Practically speaking, this provides some convenience beyond mere philosophical pondering. Most importantly, when a blade needs to be thinned or otherwise refinished, it is tremendously helpful to remove the handle and address the surface all the way onto the tang. If a handle is damaged or worn out, it is easy to replace. There are also some drawbacks. Handles installed in the fully traditional way often loosen or come off unexpectedly. There is also a risk of moisture getting inside and the tang rusting out unbeknownst to its owner.
For these reasons, I (and many others) have adopted a hybrid version of this traditional method that involves burning in the tang but also applying a sealant to limit the risk of moisture infiltration and loosening. Hot glue works great. In terms of performance its hard to beat. When you need to remove the handle, you can heat it gently and pull it off. But its hot glue, which is a little yucky. So lately I’ve moved to using Italian sealing wax on my higher priced knives. Its natural, easy to clean off and all around feels better than using plastic. The downside (there usually is one) is that its not a strong and durable as the hot glue. Its possible that it could reach its melting point if left in a car on a hot day. So I’ve reserved it for the premium offerings and stuck with hot glue for the performance oriented lines of product. Whichever you use, this method is excellent. Because it’s not fussy, it offers the utility of removability at a very reasonable cost.
But it does not fully capture the aesthetic or notion of the blade as independent from the handle. So I set out to create a handle that would not involve screws or machine tools, but would use the vocabulary of Japanese bladesmithing and offer some aspects of that experience without succumbing to petty imitation.
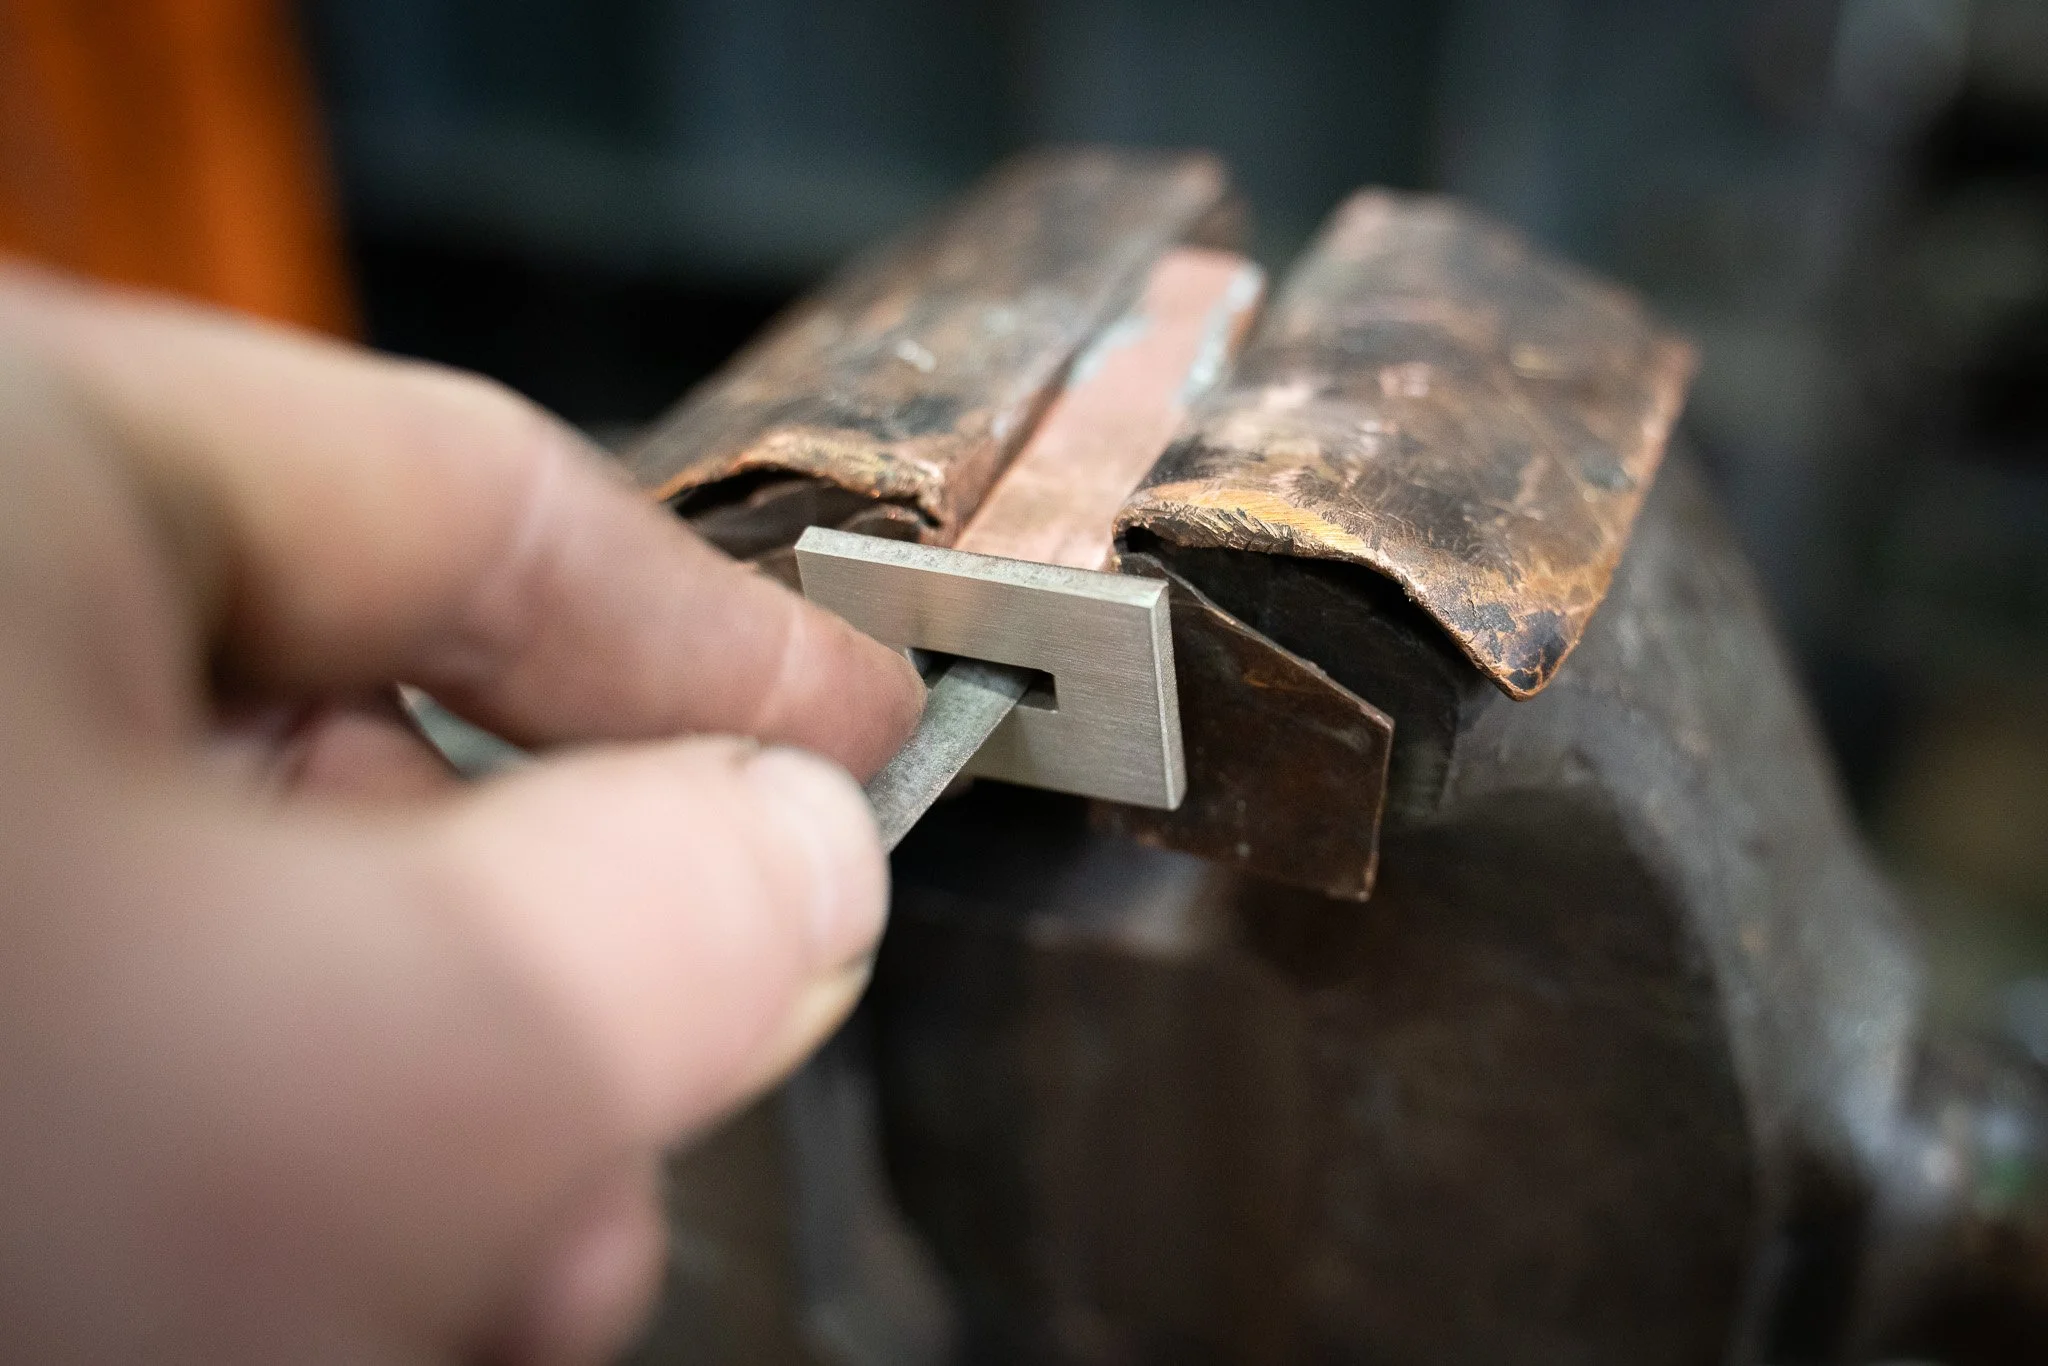
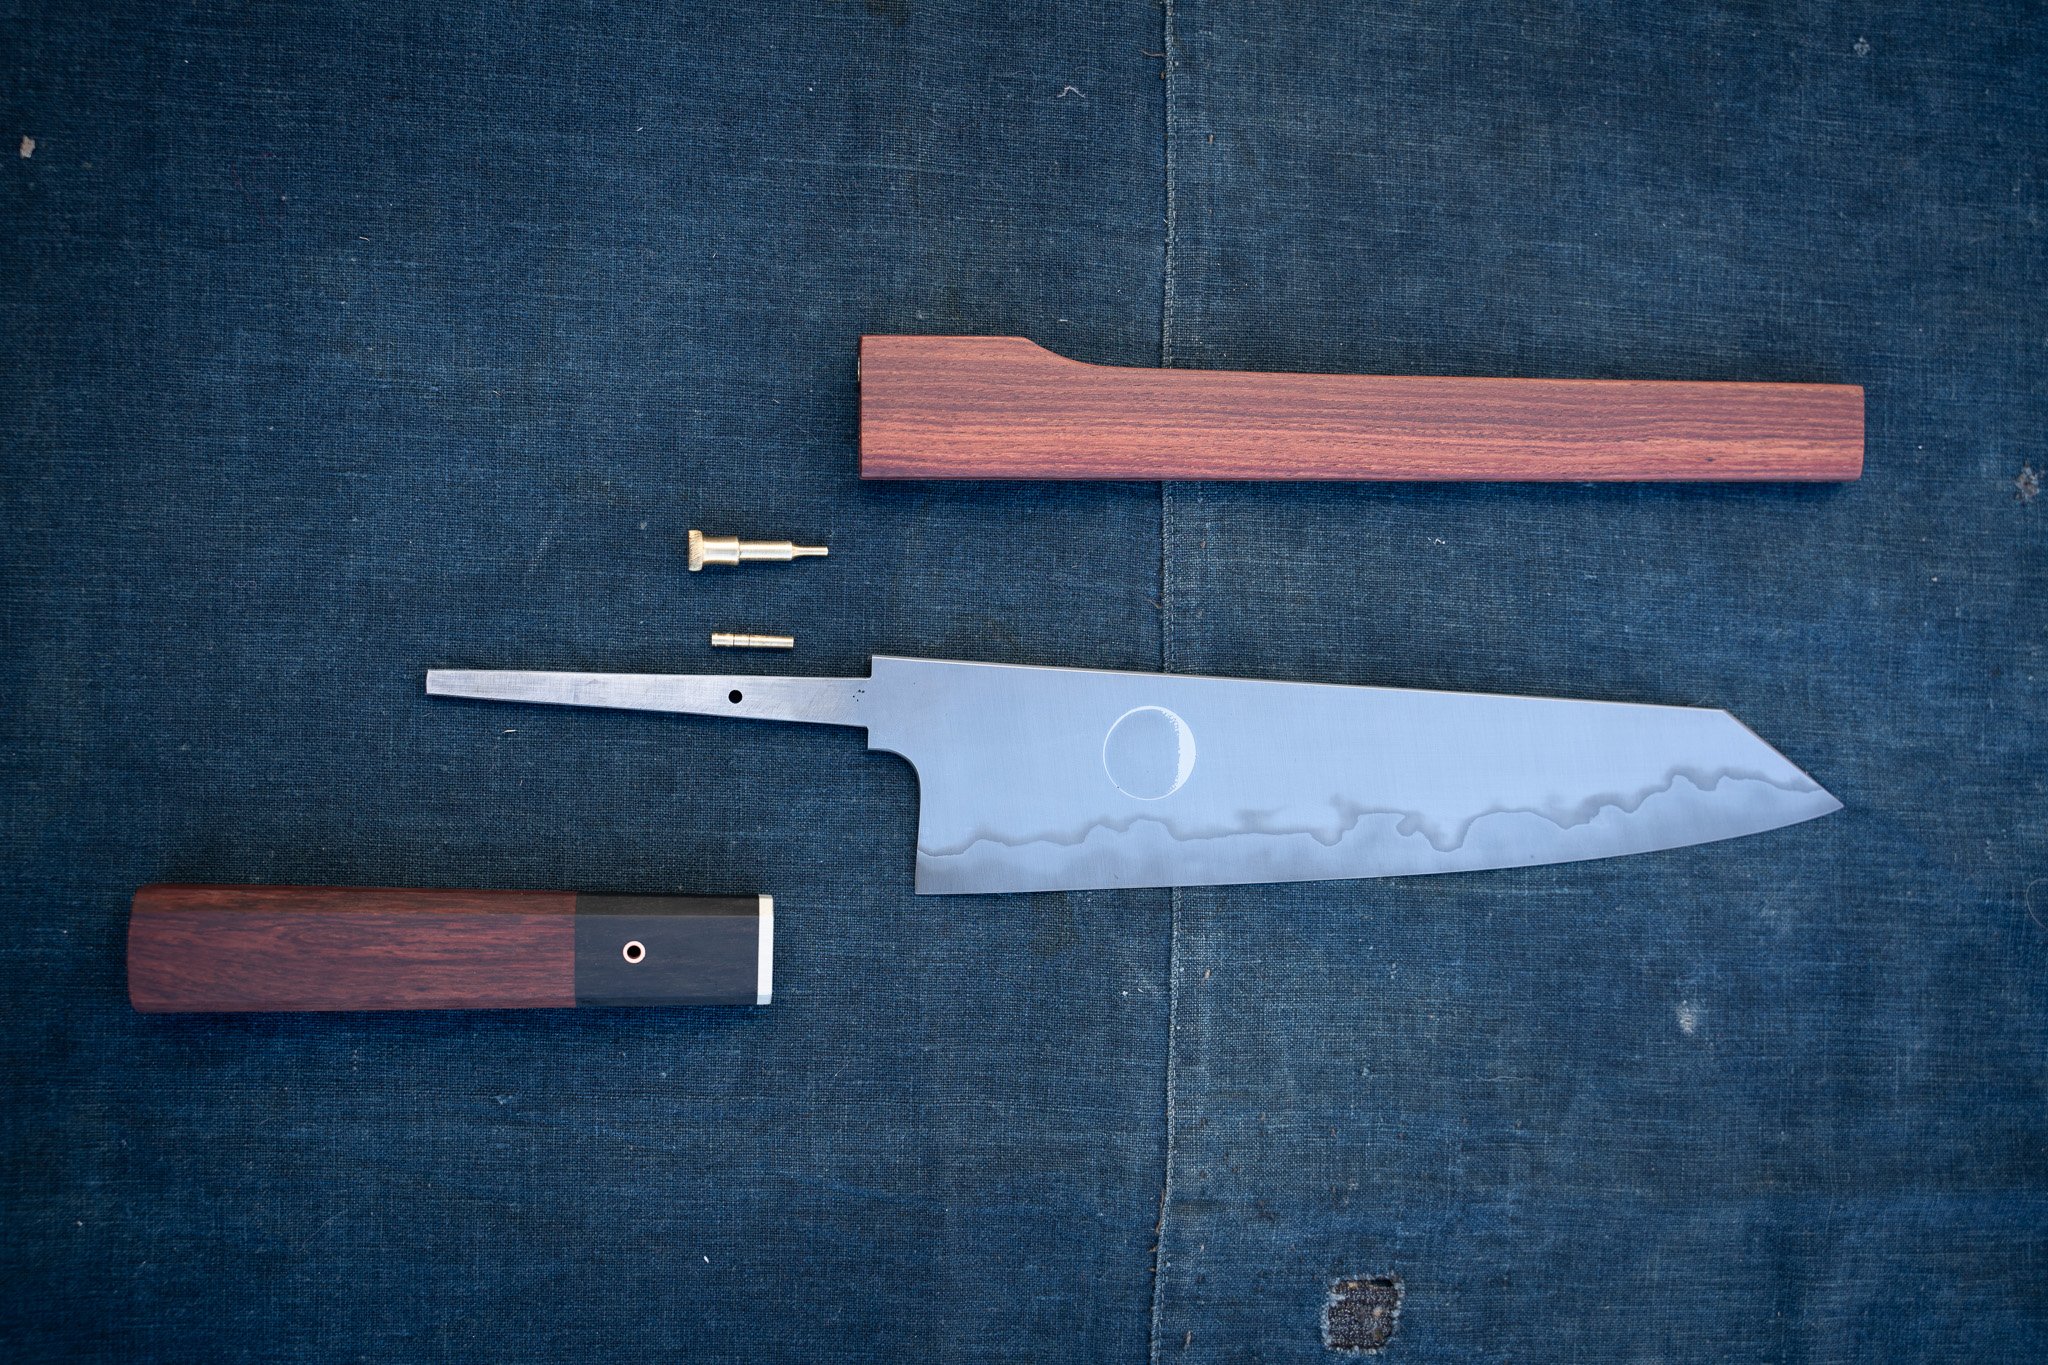
First, the tang is shaped by hand and by eye, like all of my tangs. Then a copper or bronze liner is also formed by hand to create a metal-metal interface when the tang is inserted into the handle. This is meticulous and time consuming work.
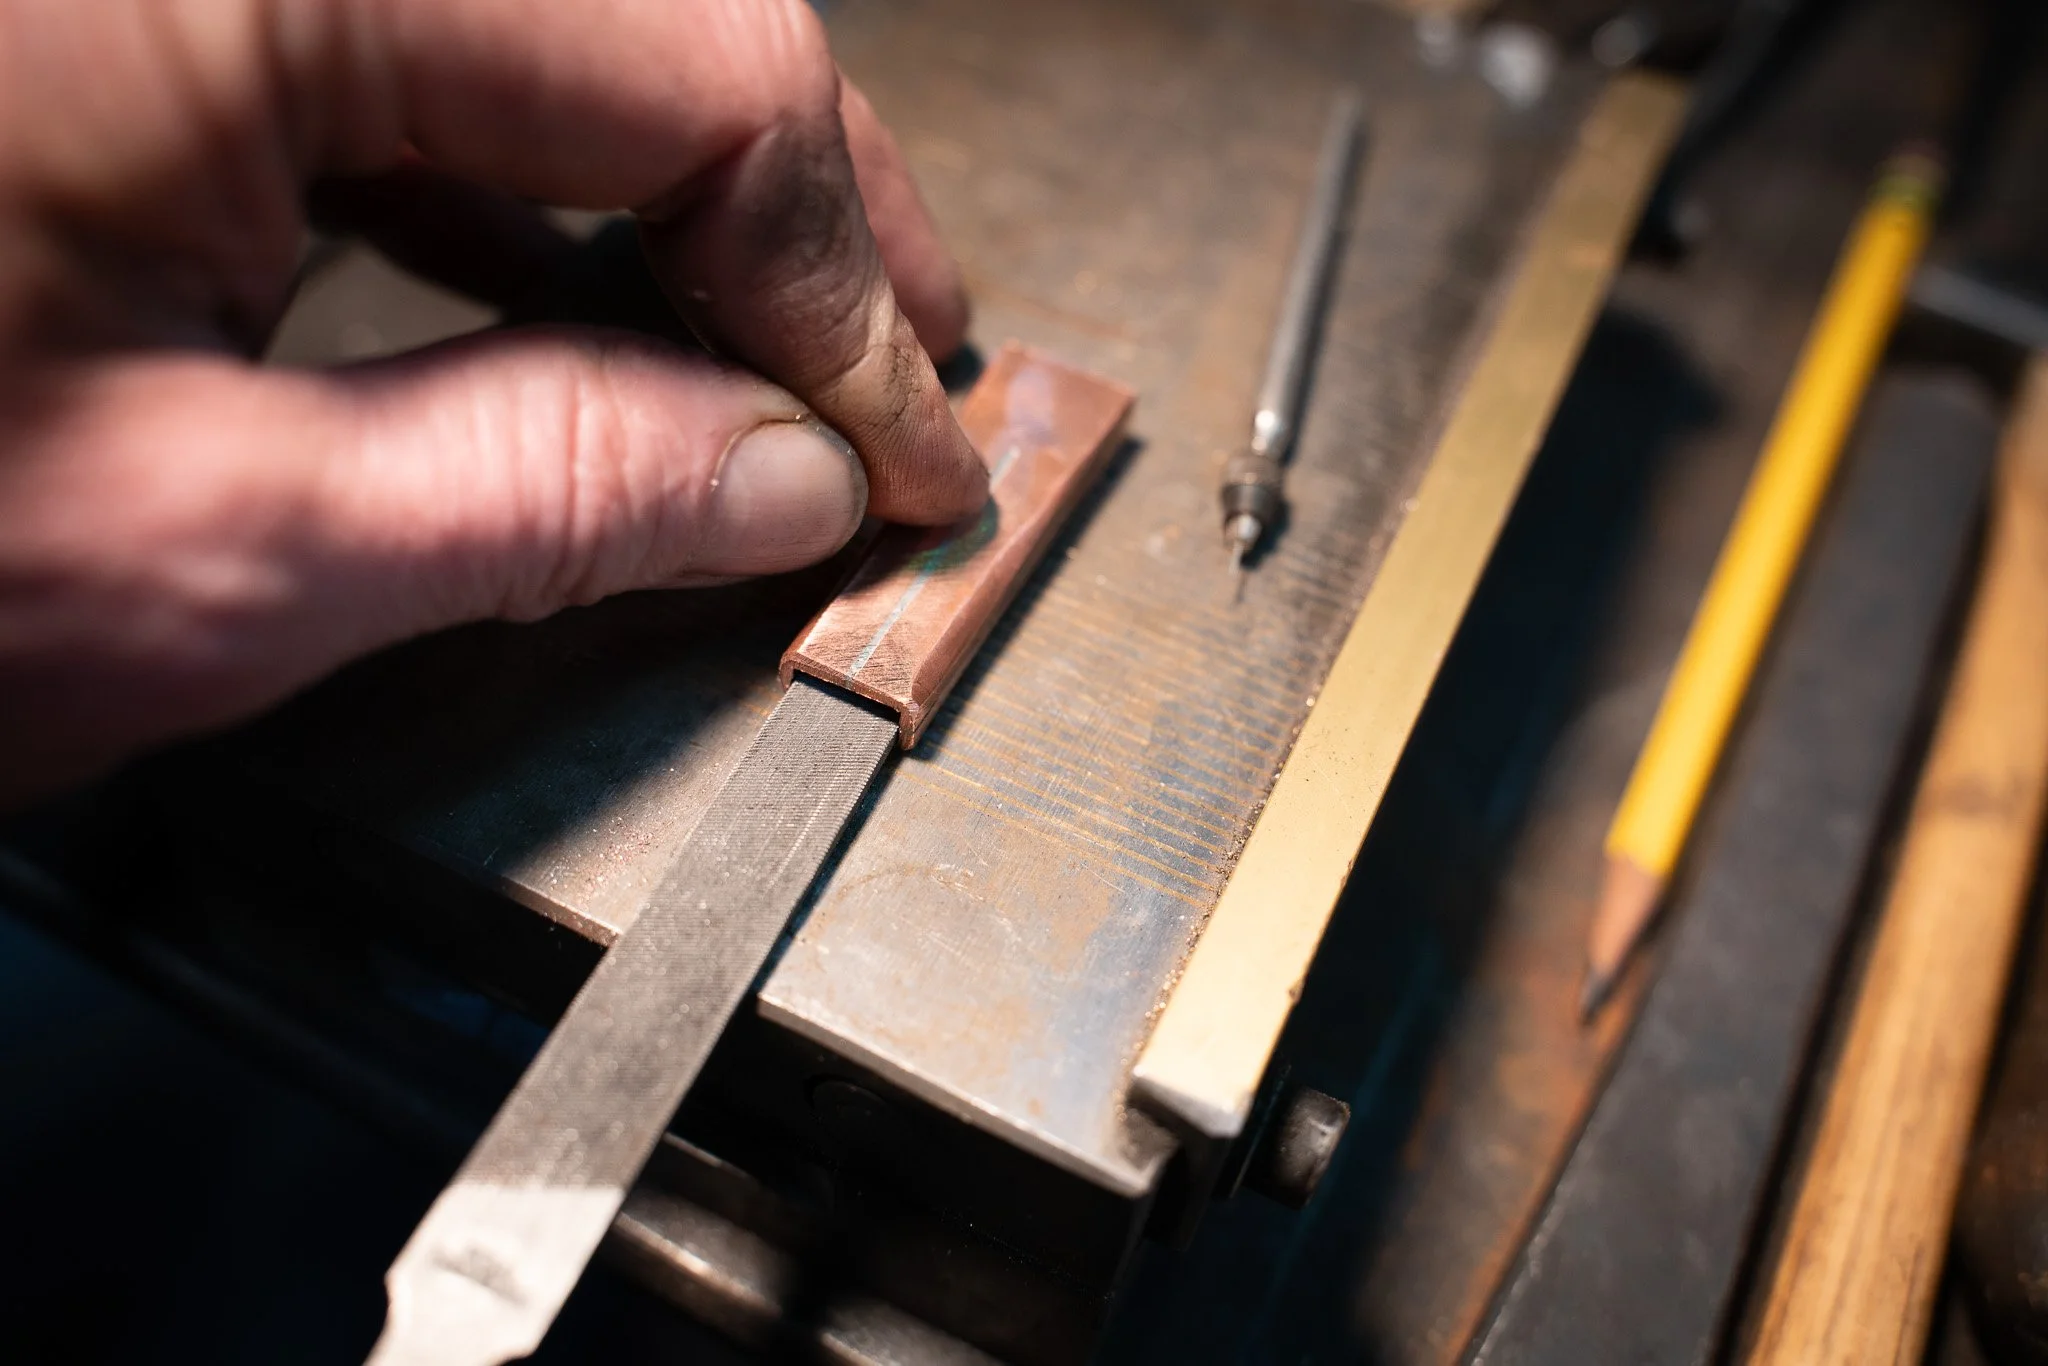
Several more elements are carefully made and assembled with silver solder: the bolster and the lands for the tapered pin. These parts are then fit into a wooden handle that must be constructed of several pieces.
(Sorry, I never remember to take enough pictures)
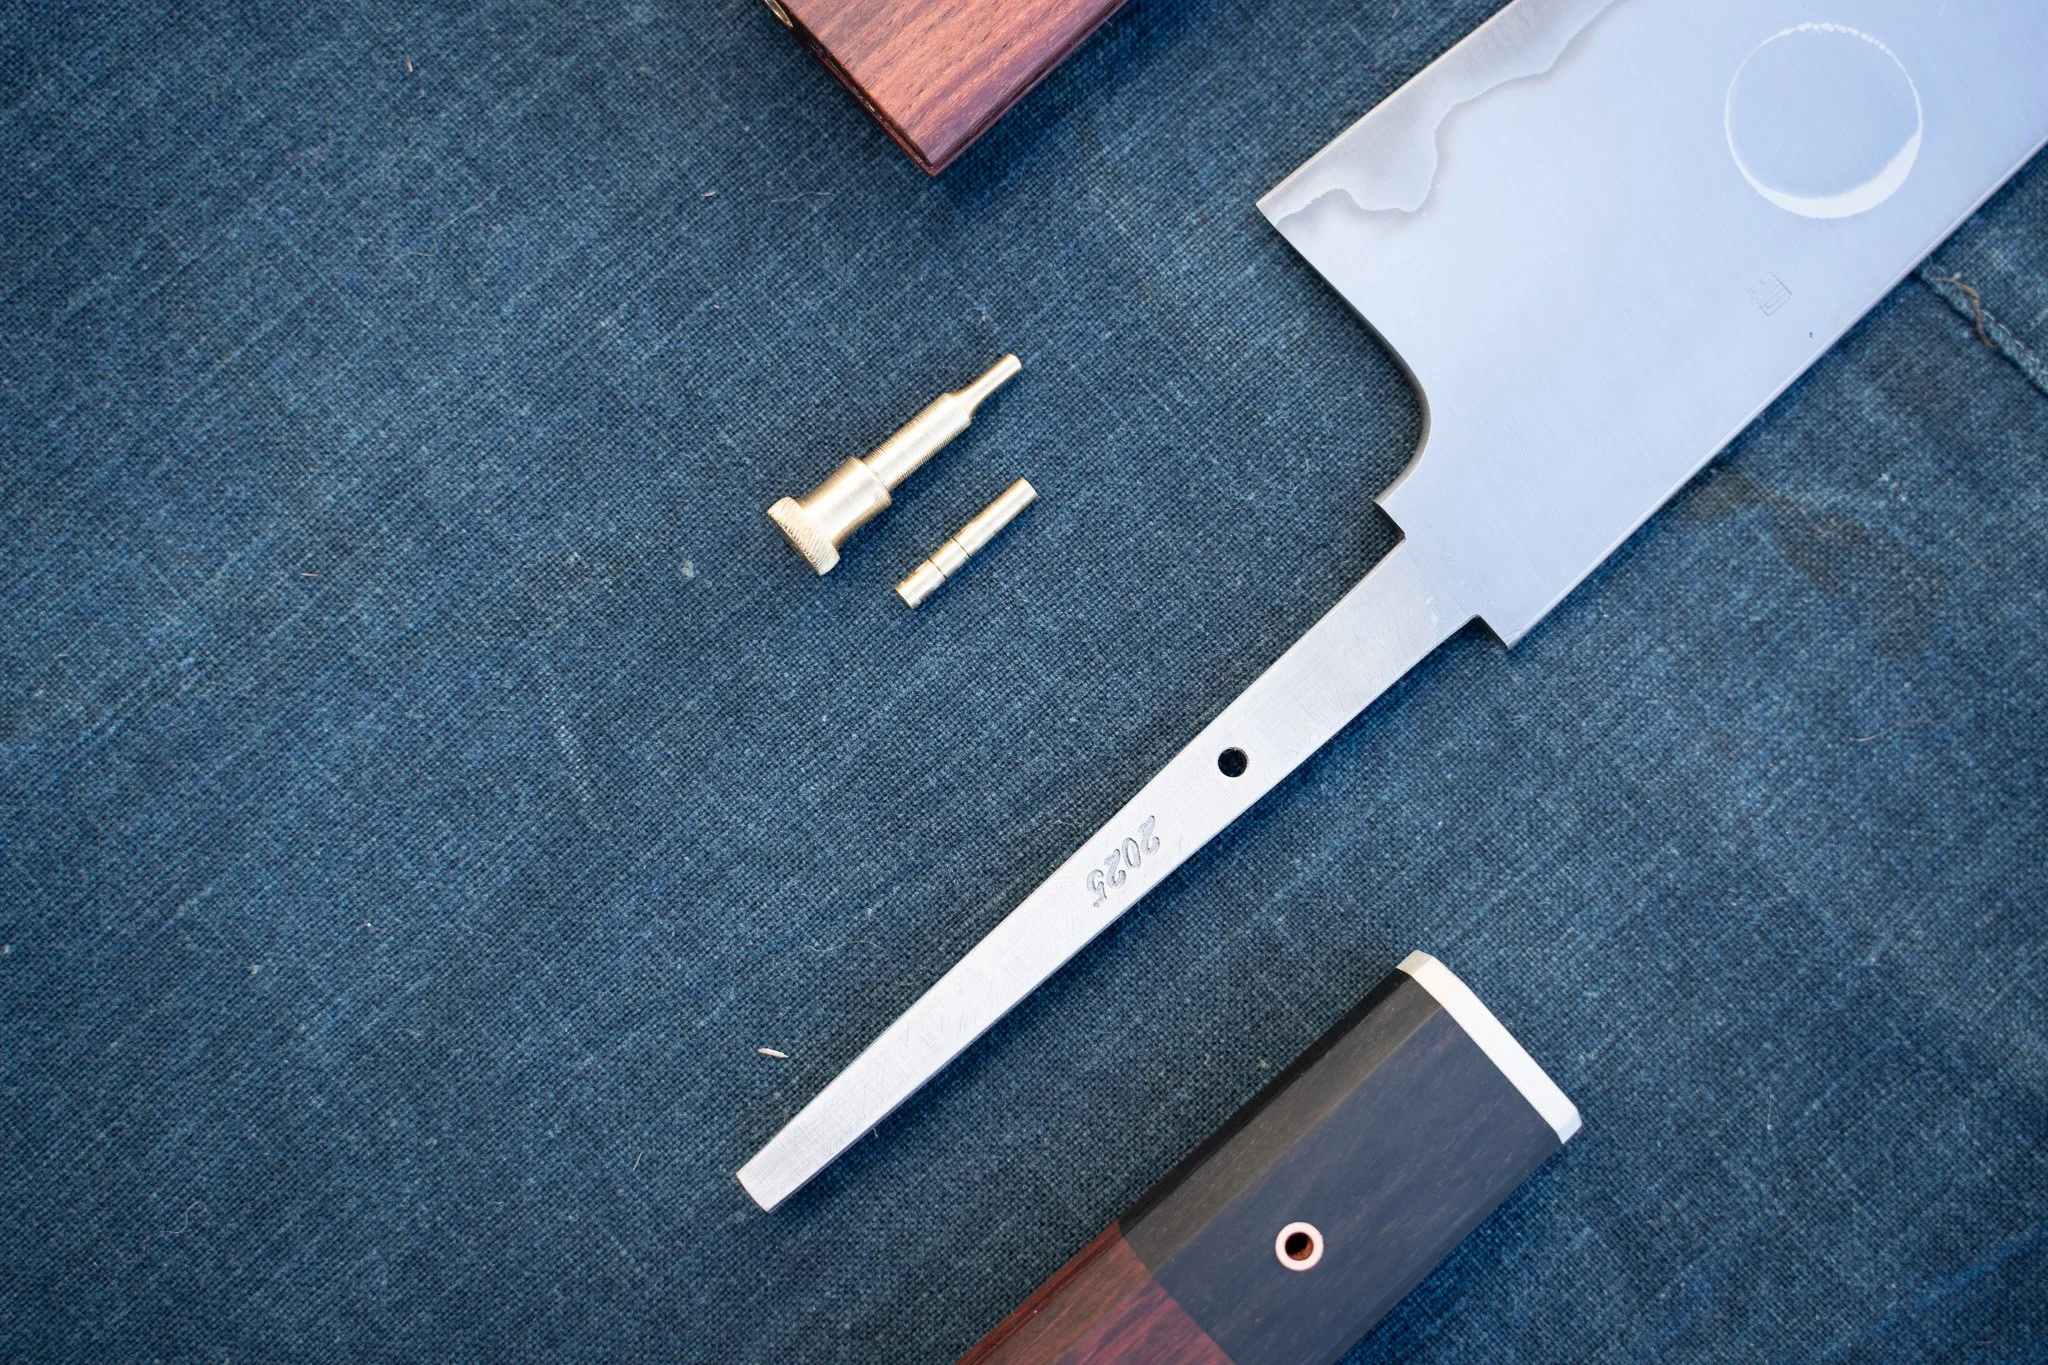
A small silver mark is made on the top of the bolster so that the handle can be oriented properly when reinstalling the handle. The pin will not align with the hole if the handle is upside-down.

You can also see in the photo above, the engraving on the tang. In this case, simply the year it was made. While I was not brave enough to hand engrave a “Meikiri” and I would not say that this tang is half of the visual value of the knife, this is something I like about these handles. I can include additional writing or marking that need not be part of the visual composition of the bade itself.
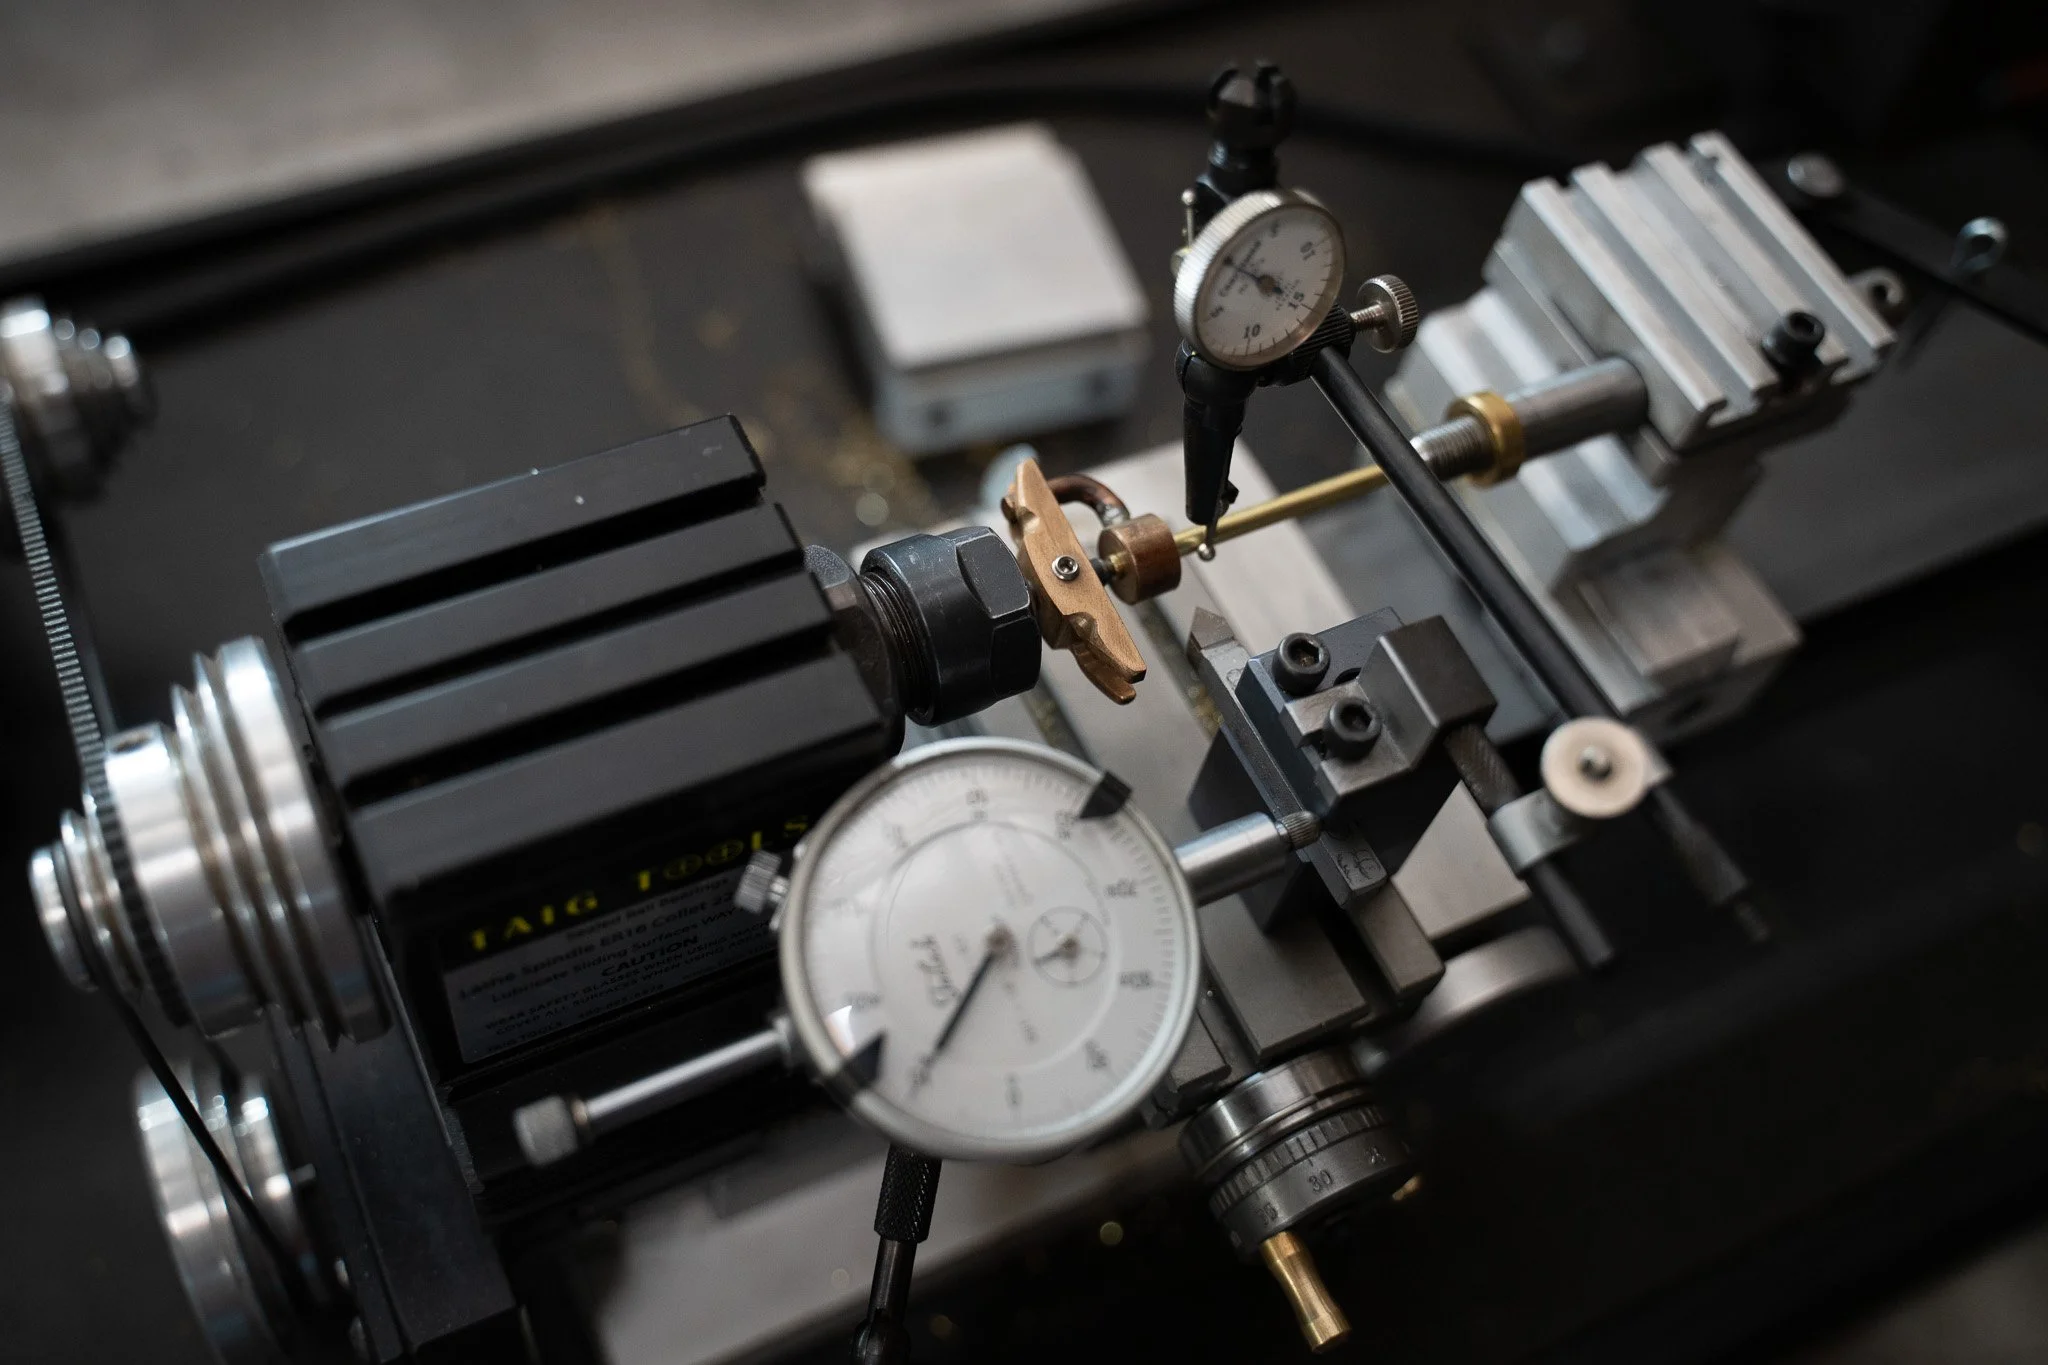
Finally, the tapered pin and pin removal tool (like a Mei-Kugi-Nuki) are turned on a mini lathe. This is the only place where I resort to machine tools. I am not a machinist at heart and I’m honestly not very good but its been fun to practice the basics. The lathe allows for a precision and appearance that would be quite hard to get any other way.
I also make a matching wooden edge guard with a little holder for the pin tool. The final result is an ensemble of objects, each discreet, that combine into one.

I must say that I am very happy with the result. I only wish that it was possible to produce these without such meticulous and time consuming work, so that I could offer more of them and at a more accessible price. As it is, the burn-in plus thermal sealant method remains the best solution, practically speaking. But I am pleased to share this version, even though it will be on a very limited frequency.